Sirimote For Mac
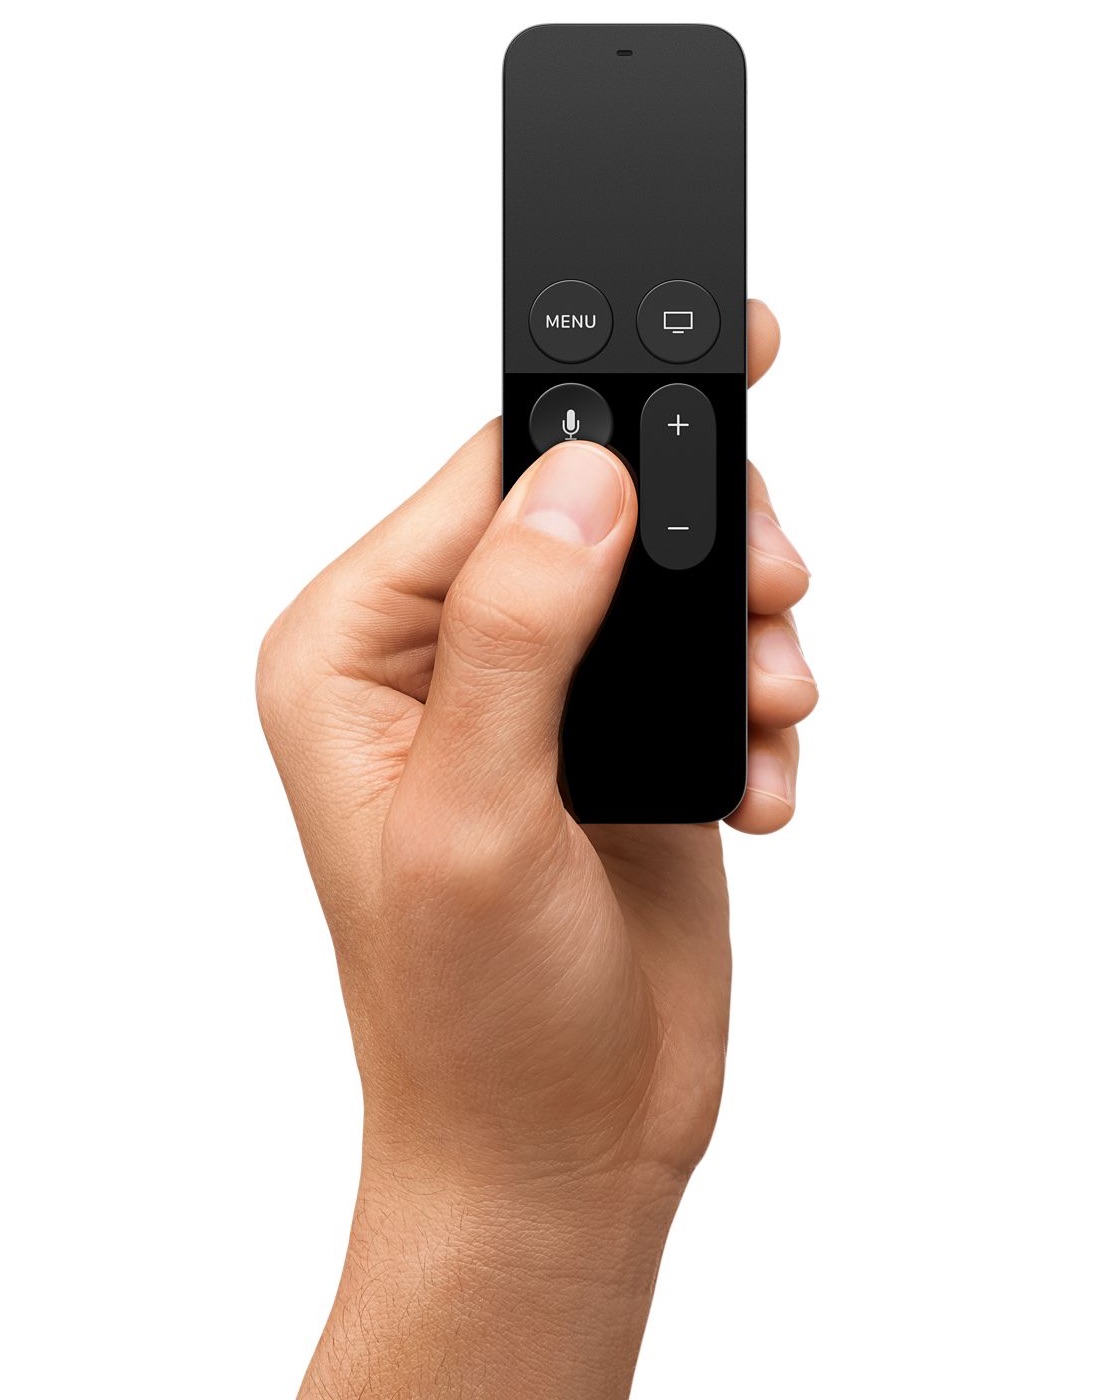
The new Apple TV includes a beautiful, redesigned remote with touchpad functionality that allows for incredibly precise controls. In addition to using it on your TV, a new software called SiriMote will allow you to use it to control your Mac too.
Apr 05, 2016 SiriMote allows you to connect the bluetooth based remote to any mac that supports bluetooth 4.0 & is on El Capitan 10.11 or newer. The SiriMote utility is completely free & allows for basic control over media functionalities throughout not just OS X. This is where a handy little app called SiriMote comes in, which lets you use the Siri Remote to control media playback on your Mac in an absolutely seamless fashion. First up, we'll show you how.
How it Works
SiriMote lets you control any applications on Mac that play media, such as iTunes, Spotify, QuickTime, Keynote, Photos (Slideshows), and many more. Unfortunately, it only works with the buttons on the remote the touchpad itself won’t control your Mac. For example, you can click the main button for next track and the Menu button for previous track. Holding these buttons fast forwards and rewinds respectively. And of course the volume up/down buttons and the play/pause button function correctly on Mac.
System Requirements
SiriMote requires a Mac running Mac OS X 10.11 El Capitan. The Mac must also have Bluetooth 4.0. The following models include Bluetooth 4.0:
- MacBook Pro (2012 or Later)
- MacBook Air (2011 or Later)
- iMac (2012 or Later)
- Mac Pro (2013 or Later)
- Mac Mini (2011 or Later)
How to Install Siri Remote
First, Click Here to visit the SiriMote website and download the application (it’s free!). Open the downloaded file and follow the installation instructions. You may have to right click the file and click Open if it gives you an unidentified developer error.
Once you’ve installed SiriMote, be sure to unplug your AppleTV to prevent Siri Remote from automatically pairing with it / turning it on.
Next, you’ll need to pair the Siri Remote with your Mac via Bluetooth. Open System Preferences > Bluetooth. On Siri Remote, press and hold the Menu and Volume Up buttons for about 5 seconds. You should see the device appear on the Mac. Click Pair to pair the remote.
Re-pairing with Apple TV
If you want to pair the Siri Remote with Apple TV again later, you’ll need to unpair it from your Mac by clicking the X next to the remote in System Preferences > Bluetooth. Now plug the Apple TV in again. Siri Remote should automatically repair to the TV, but if it doesn’t you can hold the Menu and Volume Up button to pair.
iMacs used to ship with an Apple Remote but in recent years the company has stopped and only ships its new Siri Remote with Apple TV. But you can still use it to control apps on your Mac.
It wasn’t that long ago when iMacs shipped with an Apple Remote. Both the first and second generation Apple Remotes used infrared ports the interact with the Mac’s Front Row media program, Apple Keynote, iPhoto, Aperture, iTunes, and many other native apps. The remote also supported Apple TV, iPods, and iPhones.
The Siri Remote, which launched in 2015, has been designed specifically for the always-on Siri capable Apple TV and serves as a replacement for the original Apple Remote. It too will work with macOS devices — assuming you install a free third-party app called SiriMote for Mac.
Once SiriMote has been installed on your Mac, you can control your favorite macOS apps, including QuickTime, iTunes, Apple Keynote, Microsoft PowerPoint, and many more. The requirements are relatively lax, as you only need OS X El Capitan 10.11 (or newer) and a Mac with Bluetooth 4.0.
Installing SiriMote
You can pick up a free version of SiriMote from the Eternal Storms Software website. Once installed, be sure to place the freeware in your Mac’s Applications folder. It tends to fall into the Download folder instead during installation.
Setting up SiriMote
- Open the SiriMote app on your Mac.
- Click Open to confirm it’s okay to use this app on your computer.
To Pair Your Siri Remote with Your Mac
To use SiriMote on your Mac, you’ll need to follow these instructions to first pair the two devices:
- Unplug the Apple TV the uses the Siri Remote.
- On your Mac, launch System Preferences from the Dock.
- Click Bluetooth.
- On your Siri Remote, press and hold the Menu and Volume Up buttons for five seconds.
- On the Bluetooth screen, click Connect next to the listing for the Siri Remote. (Instead of saying Siri Remote, it may include a series of numbers.)
- On the popup, click the Open System Preferences button.
- On the Security & Privacy screen, click on the lock at the button left side of the screen.
- Log in with your username/password to unlock, when applicable.
- Under Accessibility, check the box next to SiriMote.
- Click the lock to prevent further changes
- Exit Security & Privacy.
Your Siri Remote is now paired to your Mac.
Using SiriMote
With SiriMote installed and your Siri Remote paired with your Mac, the fun can begin. To use SiriMote on your Mac, you’ll want to press the Home button whenever you’re in an app where you’d like to use the tool. Otherwise, you should click the Move SiriMote into the background button in SiriMote.
To activate SiriMote, simple press the Home button on the Siri Remote when you’re in an app or better yet, double-click the SiriMote’s icon in Finder or the Applications folder.
The folks over at Eternal Storms Software say the app works with iTunes, Quicktime, Keynote, PowerPoint, and more. Commands are as follows:
- Menu button: With this button, click to go to the previous track or press and hold to remind.
- Home button: Click this button once to show/hide the SiriMote app or press and hold for sleep options.
- The Play/Pause, Volume Up, and Volume Down buttons work as intended.
Note: You cannot activate Siri on Mac using the Siri Remote and SiriMote.
Free online Maze games for PC, Mac, desktop, laptop, Ipad/ tablet. Maze puzzle games for kids (girls & boys), teens to play now without downloading. Maze adventure games, very difficult puzzle games, best new free labyrinth games, good platform games, computer flash games, 3d Unity games to play online. Steps To Download Maze Games – Teeter On PC Or Mac: Use/Play Maze Games – Teeter directly on your PC or Mac.Just choose any of your favourite emulator from below links.Use your phone as a remote control when playing games.Run all your favourite apps on your desktop ( WhatsApp, FaceApp, Netflix etc).Seamless transition of apps from PC to mobile device without the hassle of wireline. Free Maze games online for kids (girls/ boys) to play on PC, Mac, Ipad. Games, original game, Bloxorz, Shift games, no download. Adventure puzzle games, RPG flash games, virtual worlds for teens on the internet, labyrinth games, fun 3d action games at home/ school. Download maze games for mac. Download now Maze Paint on your Mac Don't wait any longer and download Maze Paint on your Mac for free. Install the Android Bluestacks Emulator and enjoy all the Google Play games and applications on your macOS system.
The Drawback to Using SiriMote

Once you pair your Siri Remote to your Mac, it will no longer work with your Apple TV. To repair:
- On your Mac, launch System Preferences from the Dock.
- Click Bluetooth.
- Click the X next to your Siri Remote on the list of Bluetooth devices.
- Restart your Apple TV.
- Once you see the Apple TV Home screen, press and hold the Menu and Volume Up buttons for five seconds on the Siri Remote.
The Remote automatically pairs to Apple TV at this point. You’ll need to repeat the steps above to repair the Remote to your Mac.
Back to the Future
The days when iMacs shipped with remotes are probably over forever. If you’d like to use your Siri Remote with your Mac, there is a solution. With SiriMote, you can use your Remote to control some of the most popular apps in macOS, including iTunes. By doing so, you can control video, music, presentation transitions, and more, with ease. Just understand its limitations and enjoy!